


A blog post outline is one of the most important steps when writing content for your blog.
Why?
Because without one, it's hard to structure the post, so it flows well for the reader.
It'll also take longer to write the article, and there's more chance of missing out on important details.
This post explains the basic steps of how to write a blog post outline, including what should go into it, how to structure it, and how to keep your outline organized.
Let's get started.
What is a Blog Post Outline?
A blog post outline is a list of points you make when writing your articles.
These points will help you organize your post and ensure you've got everything you need to get your message across.
If you create an outline before you start writing, you will know exactly what information you need to include in your post. This will save you time and energy as you write your post.
An outline is made up of headings and sub-headings that are usually formatted as h2, h3, and h4 tags.
Structuring your outlines this way not only makes the heading text bigger so they stand out, but it also helps search engines understand your content better.
Why Write a Blog Post Outline?
Before I show you how to write a blog post outline, let's understand why you need one in the first place.
Knowing the benefits of a well-structured outline will motivate you to always start with one.
Here are five enticing reasons blog post outlines are so important.
1. Makes your posts clear and concise
Can you imagine reading this article with no headings and subheadings?
All you would see is a huge block of text that would feel overwhelming to look at. The finished article is easier to follow and understand when you write an outline.
Why?
Because an outline makes the information logical and intuitive to read.
2. They save you time
It's true. The writing process can take some time. But, when you start with an outline, you'll get the post written faster.
That's because they keep you focused and prevent you from being distracted or wondering what to write next.
3. Helps you structure your post for SEO
If you know the keywords you want your article to rank for, you can use them and related terms as headings.
This will help you develop topical relevance in your article, making sure you cover a lot of breadth and depth of the topic.
More on how to do this effectively later in the post.
4. They help you organize your thoughts and ideas
Content creation needs planning, research, and an outline to keep everything organized.
You don't need to list your outline in order or get it perfect the first time. Just make a list of the key points you think the articles will need.
Getting your thoughts and ideas out and onto the page will help clear your mind.
And you can refine and reorganize the outline when you need to.
5. Prevents writer's block
There's nothing worse than staring at a blank page.
Filling the page with an outline, headings, subheads, and notes will combat this.
Don't be afraid to spend some time writing your outline because planning strategically will save you time and prevent the dreaded writer's block.
How to Write a Blog Post Outline in 7 Simple Steps
In this section, I'll show you exactly how to write a blog post outline step-by-step.
Including these steps in your blog content strategy will take your blogging process to the next level.
Step 1: Know your keywords
Guessing what articles to write about is the least effective way to grow your blog.
Sure, you can write whatever you like, but to get the best results, you need to find the right keywords.
When you start with keyword research, it helps with a few things:
- Perform accurate research for your articles outline
- Avoid keywords that are too competitive for your site
- Gather related keywords for multiple blog posts – saves time in the long run
- Improve your chances of your articles ranking higher in Google
Now you know how important your keywords are, let's find some so we can start writing an outline.
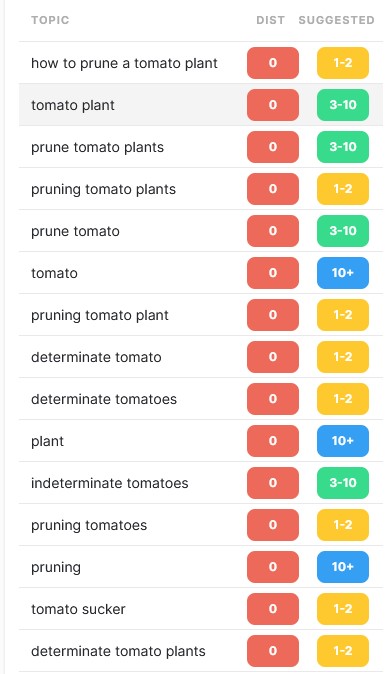
First, go to a keyword research tool of your choice and search for a broad keyword. I'm using the free Ahrefs keyword generator tool.
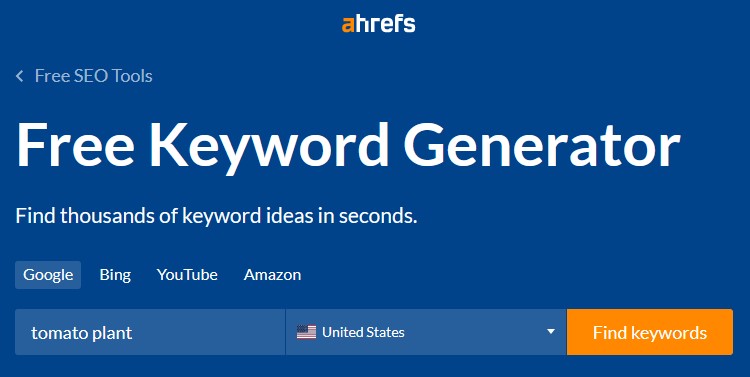
Scroll down, and you'll see a list of results:
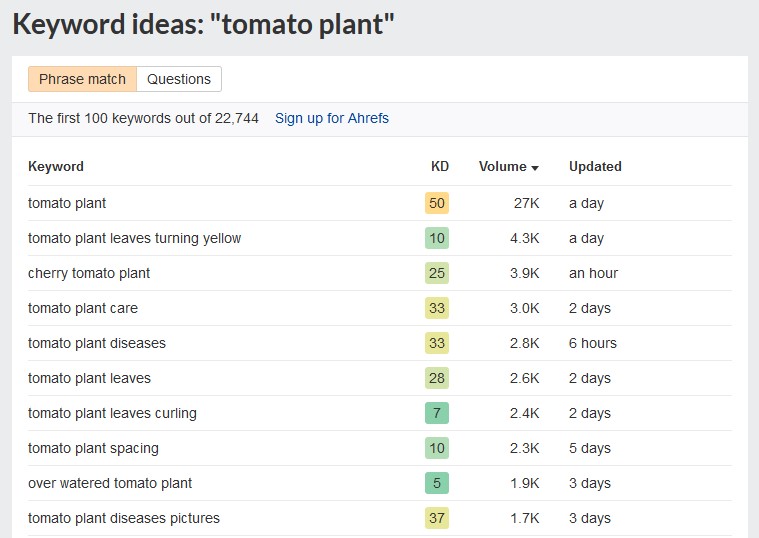
Click on the Questions tab, and you'll see a list of question-type keywords:

These keywords will be better to target as they are more long tail and will have less competition.
These are the keywords I would choose from the above list:
- how long does a tomato plant live
- why is my tomato plant turning yellow
- how to prune a tomato plant
- why do tomato plant leaves turn yellow
- how deep to plant tomato seeds
You can spend a bit of time finding a big list of keywords that have a lot of relevance to each other.
Then, when you publish content, your blog will have a lot of topical relevance, which will grow in search rankings faster.
Once you've chosen your keyword to work on, it's time to research your blog post idea.
Let's do that now.
Step 2: Research your topic
This step involves understanding the topic you are writing about.
The more you know, the better the outline will be and the easier it'll be when writing the article.
Still, you don't need a degree or to even read an entire book on the topic.
Some people will already know enough, whereas others will need to research for longer.
Just remember to keep it simple.
Search for your chosen keyword in Google and read the first article.
This might be all the research you need to do to get started. However, here are a few other ways to research your article topic.
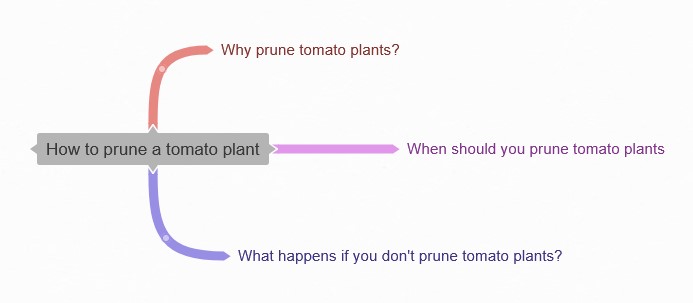
Mind mapping
Using a tool like coggle.it is a great way to organize your thoughts and clarify what you already know about the topic you're going to write.
Even if all you can think about is what you could include in the outline, it all helps:
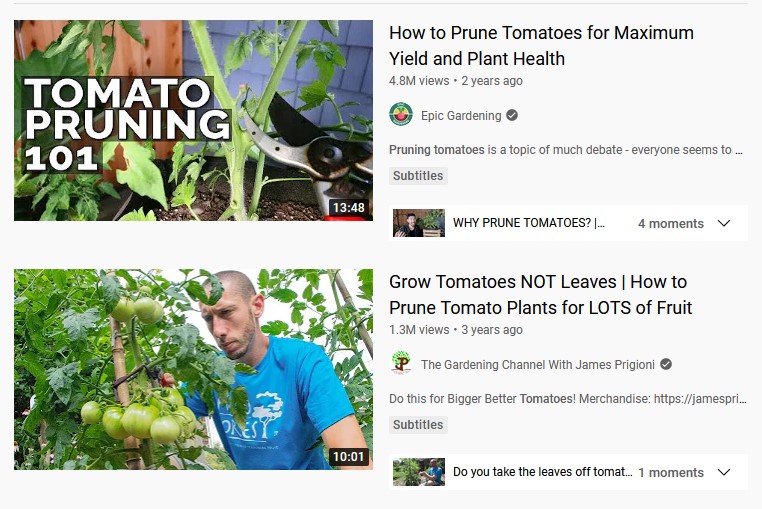
Watch a YouTube video
Some YouTube videos are very educational and pack a ton of information in as little as 10 – 15 minutes.
Even the titles in these videos provide some insights into my topic of how to prune tomatoes:
Check the table of contents of a popular book
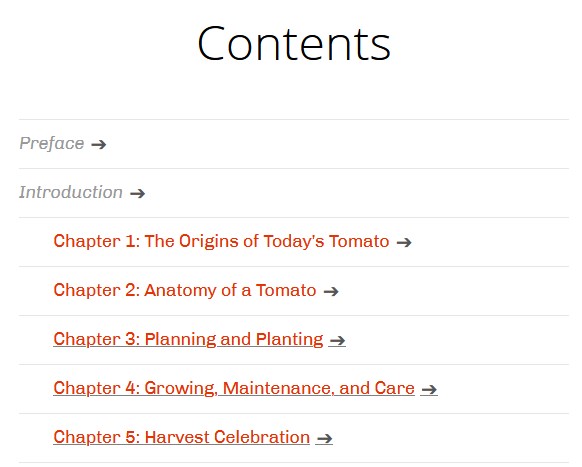
Yes, books might be a bloggers' best resource, and even the table of contents can be enlightening.
For example, the table of contents in this book mentions Maintenance and Care, which are terms I wouldn't have thought of using:
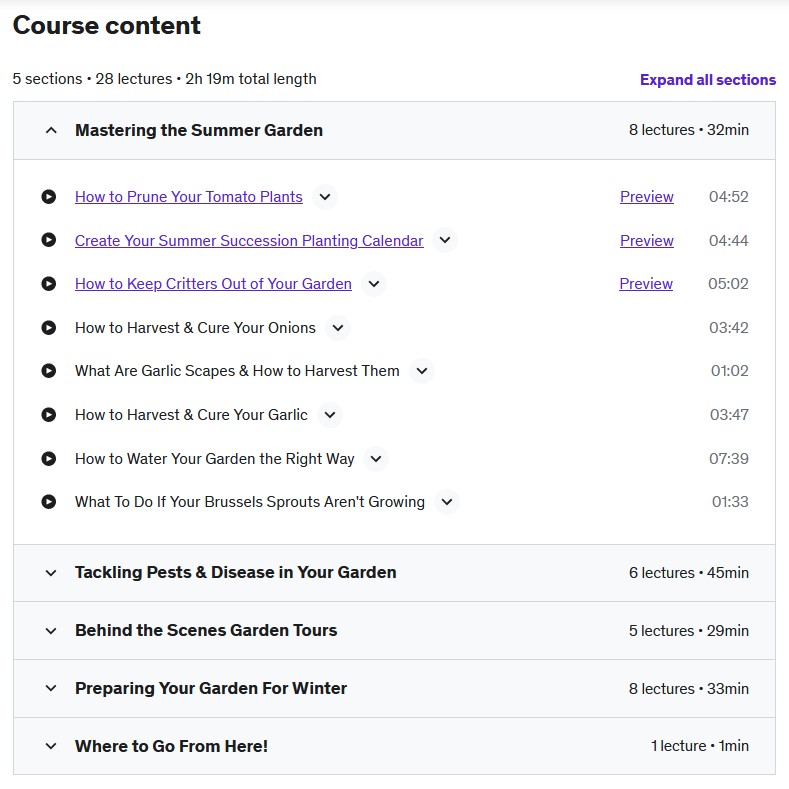
Check the table of contents of a Udemy course
Udemy has a course on practically any topic and many of them provide free lessons, which can be super helpful when researching your topic.
Look at this course I found for my chosen topic. It literally has it as the first lesson that I can watch for free:
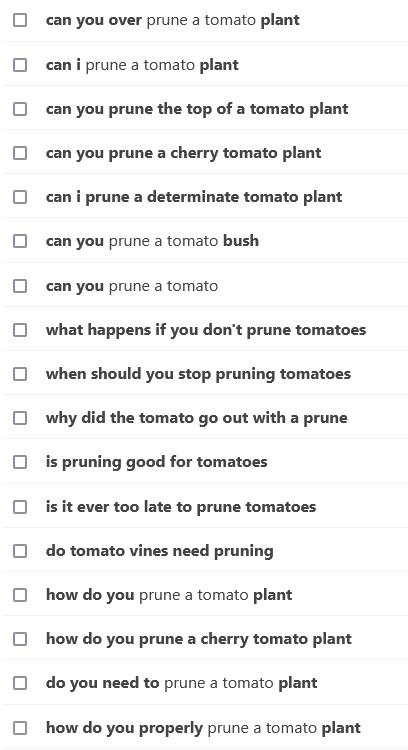
Find related questions
Keywordtool.io is great for finding questions related to your chosen topic.
Look at the questions I found:
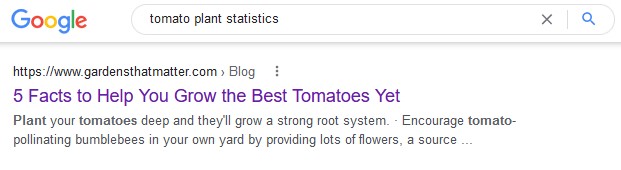
See if there are any statistics you could talk about
People love facts and statistics because it makes your research more trustworthy.
You can find stats by searching your keyword in Google with “statistics” after:
Add your research to a document or a text editor for blogging so you can refer to it when drafting your articles outline.
It doesn't need to be in order or even make sense at this stage. You can rearrange it for clarity-sake later.
Step 3: Check competing articles in Google
It's time to get a better idea of what your blog post outline will look like. Something you can really work with.
The easiest way to do this is by using Google.
If you only had to choose one of these steps to perform, it would be this one.
Why?
Because the results that show up on the first page of Google tell us almost everything we need.
These top ten results are a proven concept. The information included in these articles have passed Google's algorithm, which we can use to our advantage.
By replicating a similar outline of the articles that already perform well, we give ourselves a better chance of writing something valuable.
Here's how to do it.
Go to Google and search for your target keyword. Here are the results that show, for my example keyword:
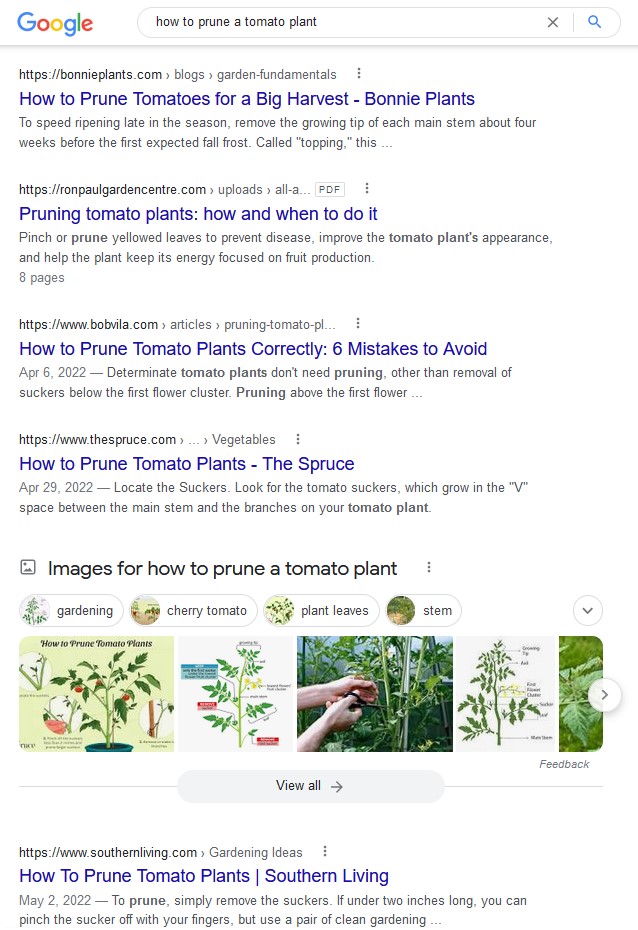
Open up 4 – 5 of the top results and note down each of their outlines. You might find similarities between each of them, which is fine.
Looking at the results in my example, I immediately notice how basic the articles are.
They aren't very detailed; they have an average word count of around 1000 words and seem a little disorganized.
Why is this important?
Because I can quite easily make my article more valuable by improving on these areas.
All I need to do is make my outline easier to follow, include more detail, and add more words than the current average.
List the main points you want to include in logical order. Do what you feel is good enough at this stage. You can tweak it later on.
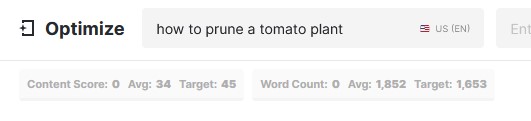
Step 4. Calculate word count
Knowing the average word count for the finished article is also important.
Why?
Because if the average word count of the top ten results is 4000 words, an outline with only five headings will not be enough.
Likewise, an article with a word count of 1000 words and 30 headings would be overkill.
Knowing the correct word count will help you define the number of points needed.
You can read our in-depth article here to know exactly how to do it, but here are the basics:
Copy the text of the top five results and add them to a tool like Wordcounter.net. Then divide this number by five to get the average.
In the next step, we'll look at search intent, what it means, and how you can ensure your outline satisfies it.
Step 5: Optimize for search intent
In Step Three, I explained how to use Google to draft a working outline.
From the research you did in Step Two and seeing how top-ranking articles structure their outlines, it should be easier to define your own.
But copying other outlines and guessing what your article needs to include isn't enough.
What you need is to understand the intention behind the searchers' query.
Also known as search intent.
Let me explain:
Search intent answers the question: What is the intention of the keyword that is being searched?
In other words: What is the reason the searcher is searching for their query?
The search intent for some keywords is obvious. Where others can be more difficult to interpret.
You see? It's all about interpretation.
Why is someone searching how to prune a tomato plant? Is it because they want to make their tomato plant look pretty?
Of course not. They want to grow better tomatoes.
If I didn't know what pruning was and wrote my outline without understanding the search intent, my outline and article would help people achieve the wrong goal.
And then it won't rank, which is why research is so important.
Combining search intent with human needs
To master this step, combine the search intent with human needs.
Human needs are the motivations why people do anything.
What are the human needs?
- Security and control
- Variety and adventure
- Love and connection
- Status and individuality
So with this in mind, what is the need for someone who wants to grow tomatoes?
My guess is security and control. There could be other needs motivating their desire to grow their own fruit and veg, but taking control of their produce is definitely a security need.
Getting more specific? Why are they searching for how to prune a tomato plant?
Because if they knew how to prune them, they would feel more confident that their efforts are optimal.
The search implies they already know that pruning is important, so it isn't essential to include all the details.
Understanding the needs, motivations, and intent behind a searcher's query provides us with a ton of information.
And it helps you know how to write a blog post outline effectively.
Step 6: Add Other outline essentials
So far I've only really explained how to define your articles main points.
But there are some other essential elements to include.
These are:
- Your headline or working title
- The introduction
- And the conclusion
Let me break these down now.
Your headline: This is the main title of the article. Make sure it includes your keyword and catches the reader's attention.
The introduction: The introduction briefly explains what the article will cover and what the target audience will learn. And with the current state of Google's algorithm, it also helps to include your primary keyword here, ideally in the first sentence or paragraph.
The conclusion: The conclusion can highlight key points you spoke about in the article. Add any call to action or links to internal articles as well.
Step 7: Putting everything together
This step is to show you how to structure your blog article. Once you've completed this step, you'll have a detailed outline that tells you exactly what you need to write about.
Starting your article with an in-depth and well-researched outline will prevent you from getting stuck or missing things out.
The main thing you need to know is the difference between heading tags.
Heading tags are defined as h1, h2, h3, and so on. They're little snippets of HTML that change the size of your headings and help search engines make sense of your writing.
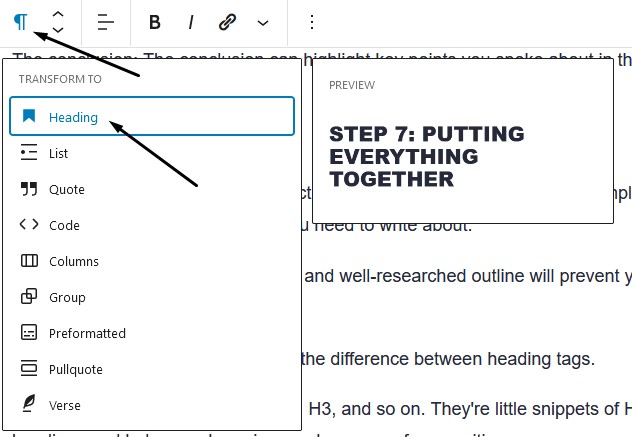
Using WordPress you won't need to know HTML, as you can turn any paragraph block into a heading tag.
Just highlight the text and select it in the dropdown:
The difference is simple. Heading tags work as a hierarchy.
Your h1 tag is your main title, and all the headings under it will be a h2 or below. The h1 is also defined in the backend of your theme, so you won't need to adjust anything.
The h2 tag are all the main points of the articles. Then if you have sub-topics to mention under a h2 heading, that will be a h3, and so on.
Your main outline would like something like this:
- h1: Main Title of the Article
- h2: Subheading
- h2: Subheading
- h3: Sub Subheading
- h3: Sub Subheading
- h2: Subheading
- h2: Conclusion
You get the idea. Make each h2 the most important, high-level talking point of your blog post. And you can organize anything you need to add under the main point using h3 or h4 tags.
How to Write a Blog Post Outline For SEO Using AI Tools
These tools will help you write your outline faster. They also make suggestions to optimize your post for SEO.
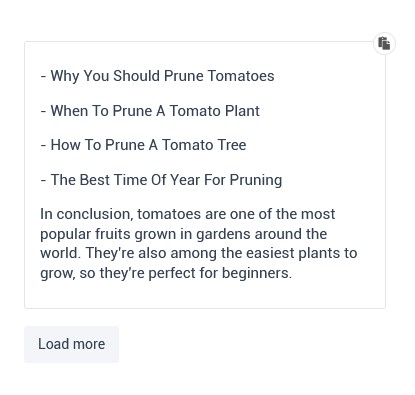
Frase
Frase is an AI tool that helps you research, write, and optimize your content to rank high in search results.
They also have a blog outline generator that quickly spits out an outline you can start with. And if you're interested to learn more about it, make sure to check out our Frase review.
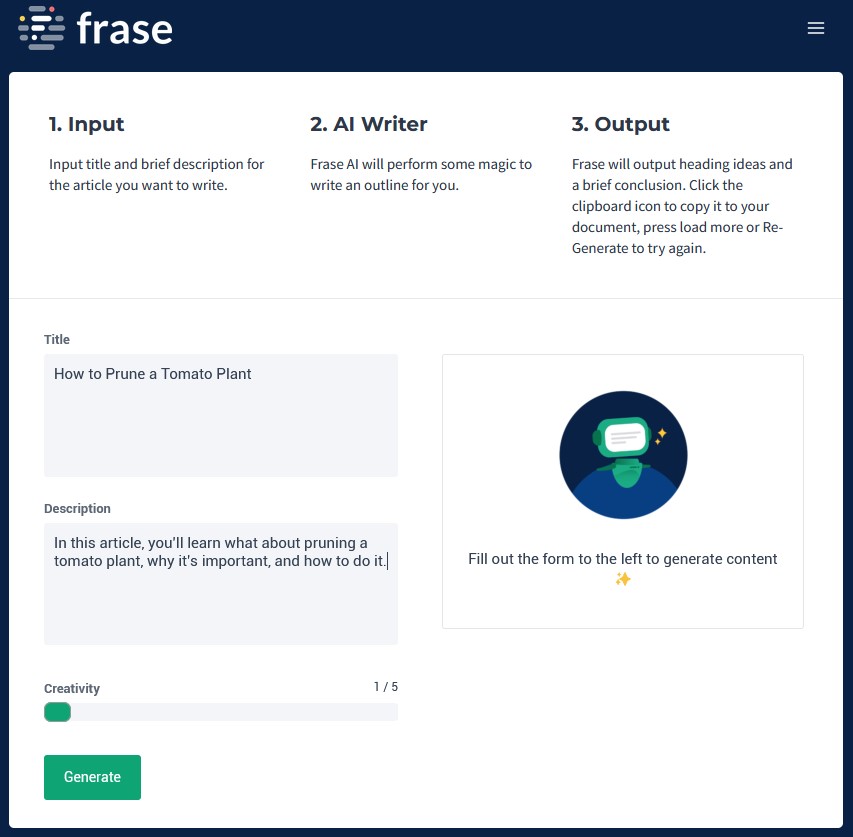
Just input some basics and press the generate button. Here's the result I got for my example post:
Market Muse
Market Muse is another great AI and SEO tool that provides you with extra keywords that are in common with first-page results in Google.
All you have to do is search for your keyword and press the button.
It gives you a huge list of keywords that should be included in your article to give you a better chance of success.
These keywords can give you ideas for your outline. And it also works out the average word count for you and a score to hit with the keywords you use.
Jasper
Jasper is yet another popular AI tool with a great blog post outline generator.
Not only will Jasper write a content outline, but it'll also help you write better headlines, bullet points, intros, and much of the article with tons of available templates. And we've got a complete Jasper review if you'd like to learn more!
How to Write a Blog Post Outline: Conclusion
Knowing how to write a blog post outline is essential for many reasons.
You'll save time writing great content that will be more professional, highly engaging, and informative.
Once you've mastered your outline, read our blog content calendar post to keep your publishing schedule organized.
The post How to Write a Blog Post Outline [Plan Like a Pro in 7 Simple Steps] appeared first on Niche Pursuits.